

Magento
Version 1.0.2 was installed and exercised on Open Source 2.4.9. Qualify other editions and versions separately.
Recorded on version 1.0.2 · Narrated walkthrough · English captions
Attribute Import/Export 1.0.2 — Magento Admin setup

00:00:00 — Set up Attribute Import/Export
Welcome to the Agentic Ecom Attribute Import/Export Admin guide. We'll walk through the main setup screens and the checks to make before using the module. This guide assumes the extension is already installed.

00:00:12 — Open settings and choose scope
Start in Magento Admin and open Stores, Configuration. Choose Product Attribute Export Settings. Check the Scope selector before editing. Use the appropriate website or store view where the setting supports it. The screen values here are a demonstration; enter the settings and service details that belong to your own store.

00:00:33 — Choose flattened export columns
In Export Flattening Options, choose whether selected custom attributes should appear as separate columns in Magento product exports. Review the attribute selection so downstream tools receive the columns they expect. These product-export options are separate from importing attribute definitions.

00:00:53 — Export attribute definitions
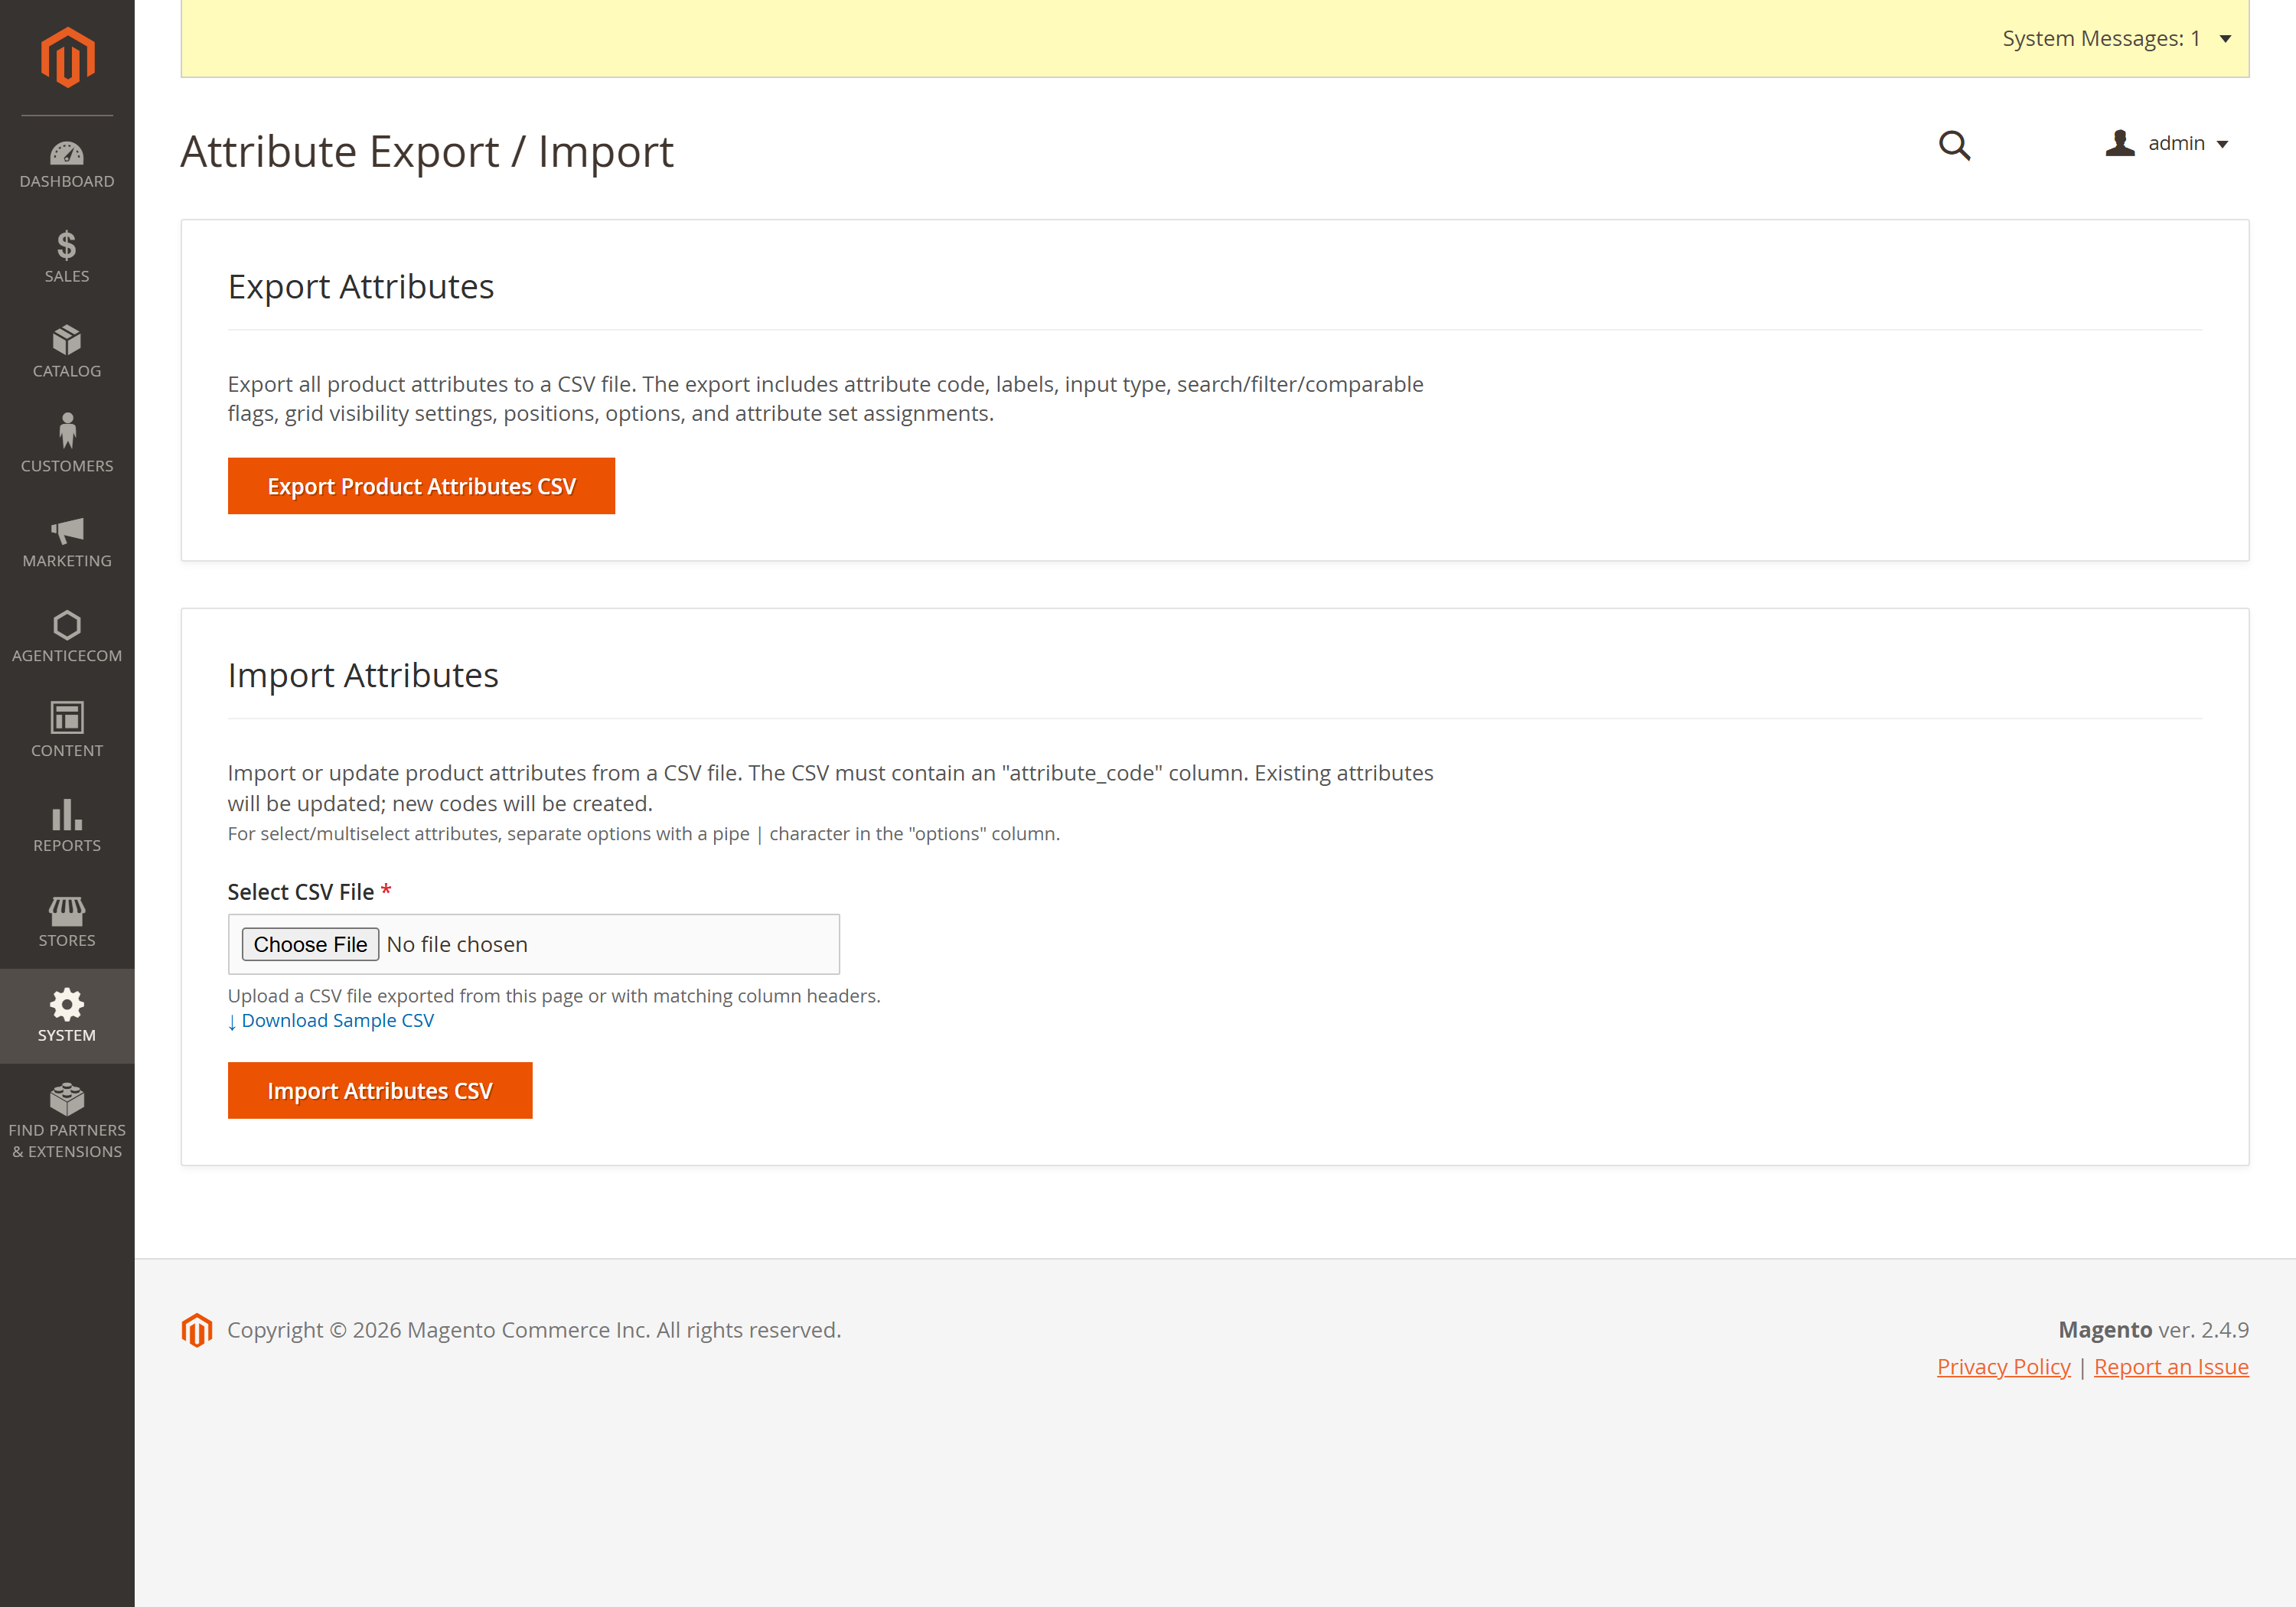
Open System, Data Transfer, Attribute Export and Import. Export Product Attributes C S V and keep a backup. The file contains user-defined product attributes; Magento system attributes are excluded. Keep the column names unchanged when preparing your edits.

00:01:13 — Prepare supported changes
Keep an existing attribute code to update its supported fields. New codes must start with a lowercase letter and use lowercase letters, digits or underscores. For dropdown options, separate labels with a vertical bar. Importing existing options appends new labels; it does not rename or delete the old options.

00:01:34 — Review import results
Upload a real C S V file within the ten-megabyte limit and check the success and row-error messages. Back up the catalogue and test a representative file first. Well-formed rows with data errors can be reported individually while other valid rows continue, so review the complete result before using the new attributes.

00:01:56 — Save and verify your setup
When your required settings are complete, use the screen's Save control and wait for Magento's confirmation. Then reopen the record or configuration and check the saved values at the intended scope. If the storefront still shows earlier settings, refresh the relevant caches. Test your own configuration before using it with customers.

00:02:17 — Your setup checklist
That's the Admin setup walkthrough for Attribute Import/Export. Check permissions and scope, review the module-specific settings, then save and verify a small staging example. Use the written guide at user guides dot Agentic Ecom dot net for installation details, complete field references and any separate storefront integration steps.
Attribute Import/Export gives Magento administrators a CSV workflow for custom product attribute definitions. Export attributes, edit supported labels, flags and dropdown options, then import updates or create new attributes by code. You can also put selected custom attributes in separate columns in Magento’s product export.
This guide covers the stable 1.0.3 release, tested on Magento Open Source 2.4.9 with PHP 8.5.10.
For an Adobe Commerce Marketplace order, install the purchased Composer package from
repo.magento.com with Marketplace access keys; see Getting Started.
No separate AgenticEcom direct-store licence is required. For a direct AgenticEcom purchase,
use your licence key from My Licences:
composer config repositories.agenticecom composer https://repo.agenticecom.netcomposer config --global --auth http-basic.repo.agenticecom.net <YOUR-LICENCE-KEY> xcomposer require agenticecom/module-export-import-attributesphp bin/magento setup:upgradephp bin/magento setup:di:compilephp bin/magento cache:flushMagento
PHP
Theme
External services
Open System → Data Transfer → Attribute Export / Import in Magento Admin. The export includes user-defined product attributes; Magento’s system attributes are excluded.
attribute_code to update it. Add a new lowercase code to create an attribute.The upload must be a real .csv file up to 10 MB with a detected allowed text/CSV MIME type.
New codes must start with a lowercase letter and contain at most 30 lowercase letters, digits
or underscores. New attributes need a frontend_label and supported frontend_input.
System attributes cannot be changed through this importer.
attribute_code,frontend_label,frontend_input,optionsmaterial,Material,select,Cotton|Wool|Linencare_note,Care note,textarea,| Field | Existing user-defined attribute | New attribute |
|---|---|---|
frontend_label, is_required, is_unique, note, default_value | Updates when a non-empty value is supplied | Sets the initial value |
Search, storefront, listing and grid flags; position | Updates when a non-empty value is supplied | Sets the initial value |
options for select/multiselect | Appends new admin labels; does not rename or delete existing options | Creates pipe-separated options |
frontend_input, apply_to | Exported for reference; import does not change these on an existing attribute | Sets the initial type and product applicability |
| Attribute scope | Not changed | Global |
attribute_set, attribute_group | A blank group preserves placement. Supply both fields to add to a named set/group. | Uses the named set/group, or Default/General when omitted. |
The importer supports text, textarea, text editor, select, multiselect, yes/no, price, weight, date, date/time and media-image input types for new attributes. Boolean attributes use integer storage. An unsupported new input type is rejected with a row message.
A missing or duplicate header, or any row with the wrong number of columns, rejects the entire CSV before attributes are changed. The importer reports data errors on individual well-formed rows and continues with other valid rows. It is not an all-or-nothing transaction for those data errors. Back up your catalogue and test a representative CSV in staging first.
At Stores → Configuration → AgenticEcom → Product Attribute Export Settings, enable
Attribute Column Flattening and choose Attributes to Flatten. The selected custom
attributes then appear as their own columns in Magento’s product export instead of only
inside additional_attributes. This setting does not change the attribute-definition CSV
on this module’s Admin screen.
A one-time purchase includes 12 months of updates and support. Renewal is optional and never automatic. Eligible standalone extensions may renew at 60% of the then-current regular list price before term end or within 30 days afterward, plus applicable tax. Purchased versions remain usable afterward. See the AgenticEcom licence and your order terms. For help, contact support@agenticecom.net with a redacted sample CSV, Magento and PHP versions, and the row error message.